SSH
When working on a small project (a Cyber Walkman podcast player - coming soon) or just editing files on a Raspberry Pi, there are two options.Edit the files on the Raspi via SSH. Disadvantage: Vim has to be configured first and that takes time. Option 2: Download the file, edit it and put it back on the Raspi. Much better but still too many steps.
Now, in response to a tweet about the Vim series here, dear @cubadonis has responded in the last few days with a possibility that significantly reduces the intermediate steps.
Files can be transferred to or from servers to which access is available via SSH using "scp" (secure copy).
So why not use the instruction Vim should load a file from a remote instance directly into a buffer via SSH and, when saving, write it back to the server directly via SSH.
Sounds incredibly complicated, but it's really simple. The commands for this look like this:
TERMINAL
vim scp://user@server:port//pfad/zur/Remotefile
This opens Vim and in Vim you can directly "scp" including a password request for the SSH connection. Once you have entered the password, you can see the file in Vim and edit it. When you save the file with ":w", the password is requested again and saved directly to the server remotely. Vim magic at its best. Thanks Cuba - I didn't know that yet - I will use it every day now.
LINUX TERMINAL
When writing scripts or programs, they naturally need to be tested regularly. In my case, it is quite easy to quickly initialize a new terminal under XMonad (Mod + Enter). But there is also the option of starting a new terminal directly in Vim and working with the familiar commands there. This can be done in two ways:VIM / NORMAL MODE
:! <command>
:term <command> (Vim 8.0)
The first option ":! <command>" tells Vim with the command ":!" that a terminal command follows and should be executed. When the command is executed, Vim itself is pushed to the background and only when the command is completed does Vim appear in the foreground again.
In my opinion, the better option is ":term". This Vim command is available from version 8.0 of Vim. The advantage here is obvious. Vim is not pushed to the background, but the terminal is initialized as a split window in Vim. You can then use "CTRL + W" to switch between the editor and terminal window as normal. This allows you to work on the file and test it in the terminal at the same time. So it's basically the terminal in Vim in the terminal.
GIT
Also often used: git. The good old version control on which GitHub and Gitlab are also based. Vim can already handle "git" in simple principles. As in the section above, we can open a terminal in Vim and work there using "git" terminal commands. This way, Vim always stays open and does not have to be left. A little more integration in Vim is provided by a plugin called "Vim-Fugitive". Vim-Fugitive enables the use of git commands in Vim itself. The plugin can be conveniently used via Pathogen (PART IV). If "Vim-Fugitive" is installed, git can be used directly in Vim.VIM / NORMAL MODE
:Git
:G
This will activate the functionality of the plugin, followed by the specific Git command you want:
VIM / NORMAL MODE
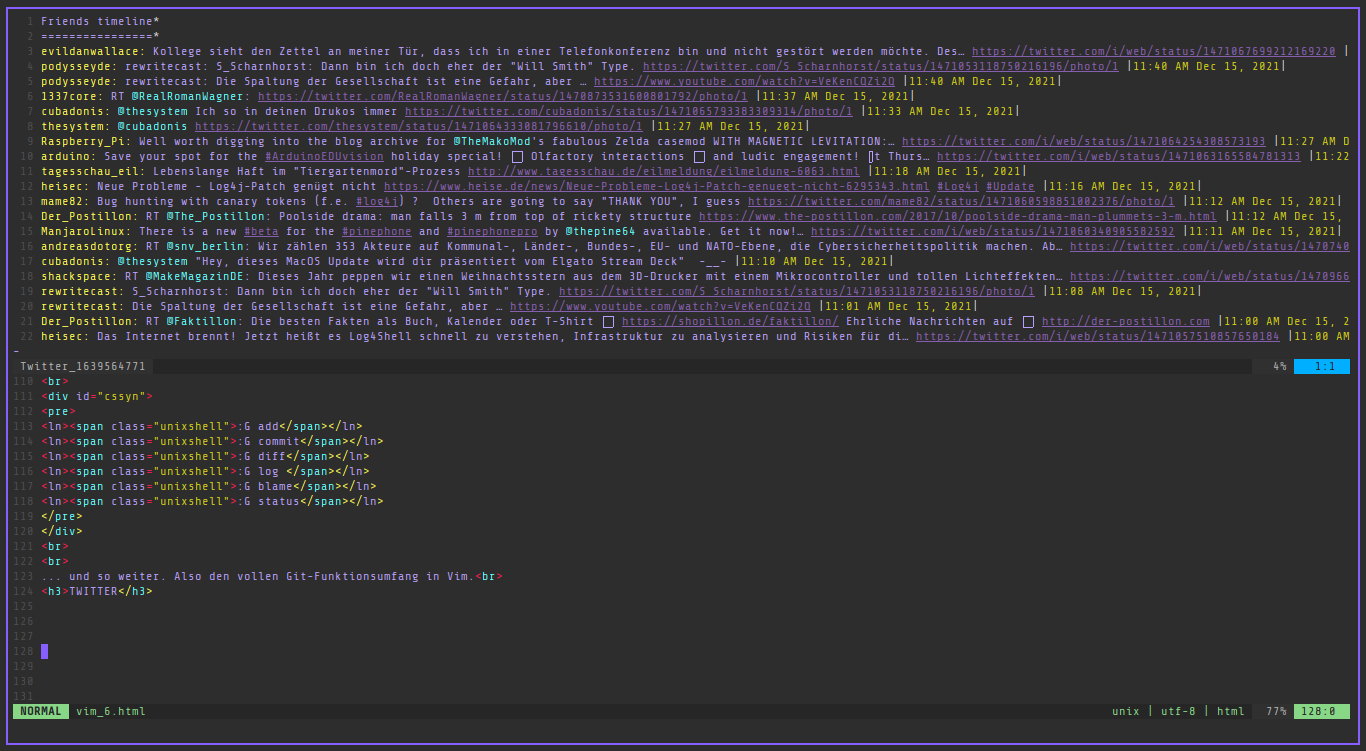
:G add
:G commit
:G diff
:G log
:G blame
:G status
... and so on. So the full range of Git functions in Vim.
Unfortunately not integrated into Vim from the start but fortunately can be used via a plugin. The plugin is available here: twitvim. To use TwitVim, you only need the following command after installation (and I'm writing it here because I have to search for it forever every time :) ):
VIM / NORMAL MODE
:SetLoginTwitter
A short URL will be generated for you to access and you only have to enter the auth number in Vim and you can now read Twitter comfortably in Vim, tweet, search, etc. TwitVim is operated using commands in NORMAL mode:
:PosttoTwitter
:FriendsTwitter
:RepliesTwitter
:UserTwitter
:RefreshTwitter
The commands are actually pretty self-explanatory, but here is the explanation for completeness:
:PosttoTwitter - After confirming the command, you will be prompted to enter your tweet text with "tweet:".
:FriendsTwitter - Shows all tweets from the people you follow
:RepliesTwitter - Shows your replies.
:UserTwitter - Shows the tweets of a specific user
:RefreshTwitter - Refreshes the timeline you are currently viewing.
This is what it looks like:
I have already described plugins like NERDTree and VimWiki in more detail here: PART 4
I would also like to mention VIM AWESOME here again, I think no matter what you are looking for, you will find it here.
CONCLUSION
This small 6-part series should be enough to be able to use Vim productively. The basics like navigation, copy & paste, markings but also a step deeper in the form of plugins and modes should be understandable. Vim is a rabbit hole with many branches. No matter what you are thinking of doing with Vim, it will be possible and with the help of plugins it is usually relatively easy to integrate it into Vim. This will definitely not be the last NERDBUDE post about Vim (I'm currently working on the Unit-2 theme for Vim - everything will of course appear here). If I come across other things about Vim, I'll of course put them here too. But for now, have fun with Vim and the "wonderful" learning curve of Vim.
[~] BACK