The ARTSEY is a one-handed keyboard with 2x4 keys. Characters are generated on the ARTSEY using key combinations.
For example, the space bar can be reached by pressing all four lower keys.
The "holy" QMK runs in the ARTSEY and takes care of the key combinations.
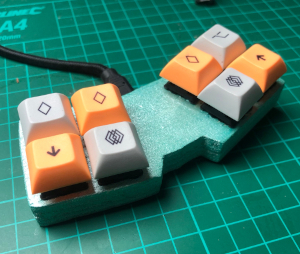
Well, the ARTSEY is definitely interesting. But let's go a bit crazy and build ourselves a "split ARTSEY", the so-called "SPLITSEY".
Of course, the ARTSEY is intended for one-handed operation, which is no longer possible due to the splitting, but you can play around with it a bit.
PARTLIST
What you need for the SPLITSEY:PARTLIST
Of course you also need a soldering iron, solder, cable and a cable that fits your microcontroller.
If you want the plate made of wood, you will also need a drill and saw.
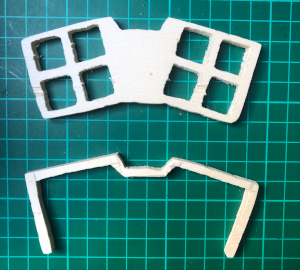
PLATE
The plate is made quite quickly due to the small number of switches. Transfer the layout to your material - cut it out - done.Put your switches in the recesses.
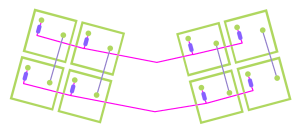
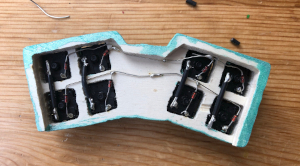
WIRING
Now it's time to wire up the cables. As usual with keyboards, there is a 1N4148 diode per switch and the switches are connected in rows and columns.Then connect the rows and lines to the microcontroller and the grid is ready.
Here is the diagram for wiring the switches:
QMK
The QMK is of course used as the firmware.Conveniently, the ARTSEY is already in the QMK repository and can be used without any problems.
Have fun building!
[~] BACK