I've always wanted a little more keyboard content on the NERDBUDE so let's talk about Oldman's ENDGAME.
0x01 - OVERVIEW
The ENDGAME is not the first and will not be the last board to be called Engame - but it is probably the only board that actually has the ENDGAME as its name. I have come across the ENDGAME a few times and luckily you can now just throw money at an online shop (*cough* KEEB.SUPPLY - and no, I am not getting paid for writing this) and get one of the PCBs to build your own ENDGAME.
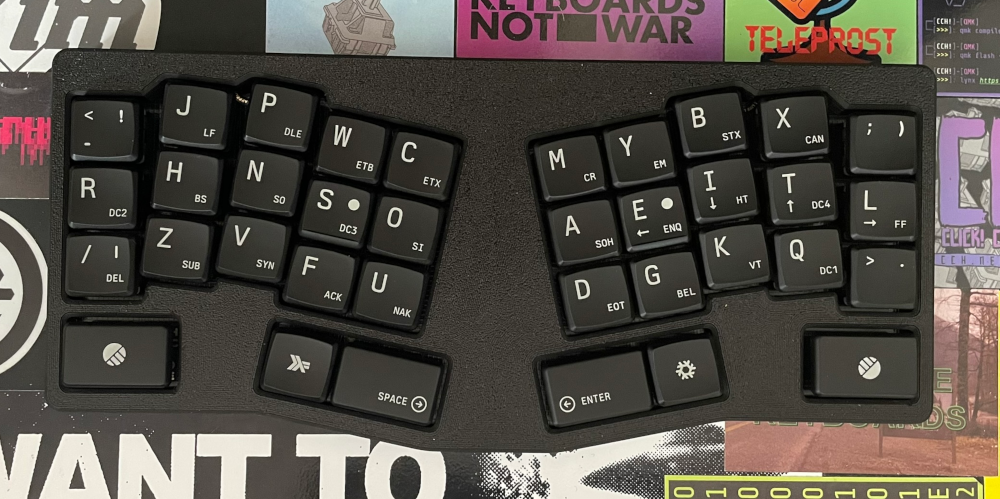
The ENDGAME is a unibody split with 3x5+3 keys. So 15 alpha keys and three thumb keys per side. The board comes as a low-profile board designed for Kailh Choc V1 switches, offers hotswap, is based on the RP2040-Zero and was designed by Oldman.
0x02 - LAYOUT
By now you should be used to me saying that this is not about run-of-the-mill rectangular keyboards (INK explained wonderfully in his GPN talk why that doesn't make sense), but about keyboards that have a few more and different considerations. This is also the case with the ENDGAME. The key layout of the ENDGAME is the 3x5+3 mentioned above, i.e. the alpha cluster is 3 keys high and 5 keys wide and 3 keys are reserved for the thumbs. The key on the outer edges is also intended more for the little finger. That's one of the reasons why this board caught my eye. The layout is roughly the same as that of the CORNE (if you break away the outer columns). Nevertheless, the ENDGAME takes a few different paths than the ortholinear CORNE.
The board is symmetrical and I will be using the left half of the split as a guide. We'll start with the pinky column. This is the default at a 90° angle. Then comes the column for the ring finger and here begins an upward offset of 5mm and a splay - i.e. the column tilts inwards. The angle of the splay here is 9°. The middle finger column follows a similar pattern, also offset upwards, this time by 3mm and with a splay of 5°. The two index columns are offset 4mm downwards compared to the middle finger column and rotate 3° away from the middle finger column. In themselves, the two index columns are the same height.
The modifiers (or thumb keys) are distributed on the outside in the lower row. On the far left and right there is a 1.5U key which is also aligned horizontally to the pinky column. On the inside there is a 1U key and a 1.5U key. However, these follow the splay of the index column.
So much for the actual key layout. By default, the ENDGAME comes with a slightly adapted QWERTY keymap. Now I have mapped my keyboards that I use regularly to KYB3R KEYS. The advantage of the ENDGAME not being that far removed from the CORNE (for which the layout was originally intended) is the fact that KYB3R KEYS can be easily ported to it. This means that all the alphas fit on it (I'm still working on optimizing the ZILPZALP) and the mods also find space on the thumb keys or in the home row mods. The separate mod for the little finger is perfect for the GUI key to control XMonad, Space and Enter are back in their usual place and Backspace and Shift also have dedicated keys.
Since I have admittedly never written my own VIAL firmware, I use the finished file that Keeb.Supply provides and build my KYB3R_KEYS on it. I will take another look at building VIAL firmware and submit the KYB3R_KEYS keymap later.
0x03 - MICROCONTROLLER
99% of the time I have built keyboards that are based on the Pro-Micro or Pro-Micro C or have the same footprint. Now the MCU boards that are based on the Pro-Micros need some space and of course this has to be taken into account on the board. Fortunately, the development of controller boards is also constantly progressing and so the ENDGAME is based on an RP2040-Zero board. This has the advantage of being smaller, which means you get a lot more space on the PCB and they are also cheaper than the Pro-Micro boards and that means you don't have more space in your wallet. The kit itself contains a 0xCB Helios, which is KEEB.SUPPLY's in-house development and is based on the RP2040-Zero chip. The size is not the only difference here. The Helios has castalleted pinholes as contacts. These are basically half pinholes that are open to the outer edges of the MCU board. This in turn has the great advantage that the MCU board can theoretically be soldered directly onto the PCB. This eliminates the need for mounting with pin headers as was previously the case with Pro-Micro boards. This enables the keyboards themselves to be built much flatter than before. A wonderful development. However, the RP2040 does not support .hex files as I am used to with the Pro-Micros. More on this below.
0x04 - PCB
The PCB in the kit comes in black with gold traces. It looks very classy and also provides a visual contrast that makes a big impression.
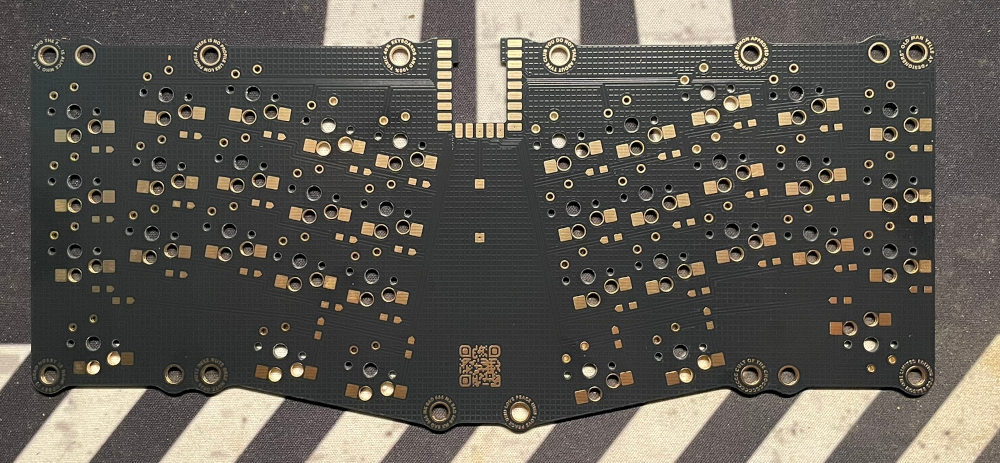
In the middle of the PCB is the "ENDGAME" lettering with the tag line "The keyboard she told you not to worry about" - hehe :D
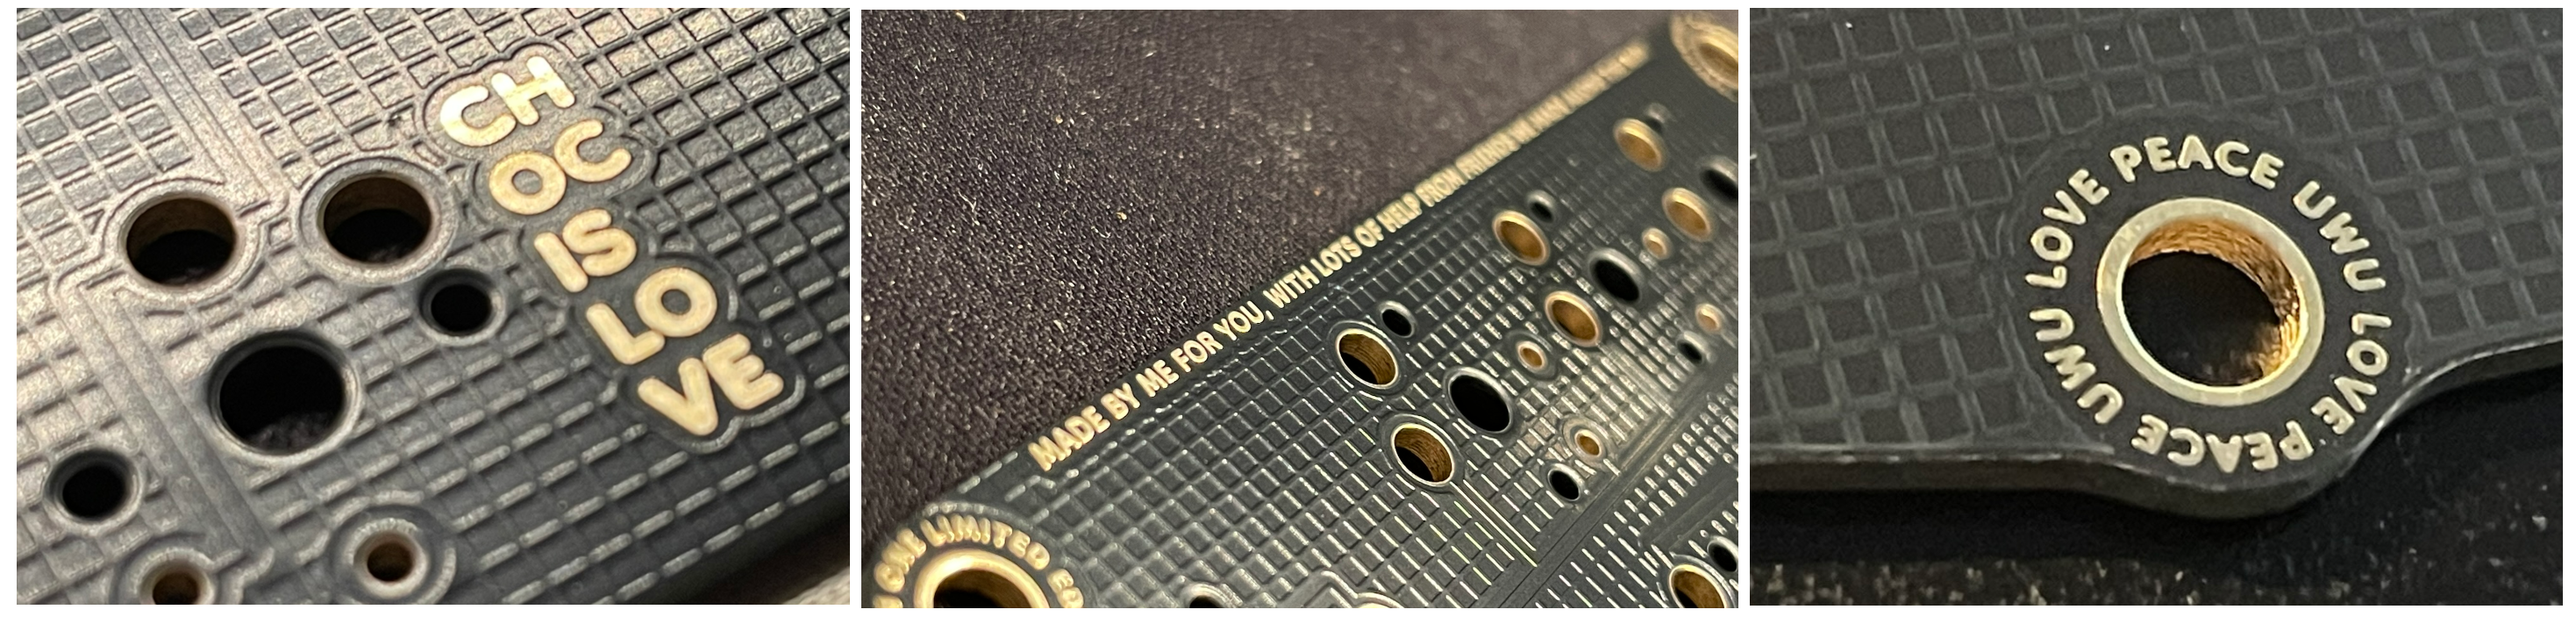
But that's not the only detail worth mentioning about the ENDGAME. The holes for the feet are each surrounded by funny stuff. For example "LOVE PEACE UWU". What's the point of all this? Because they are just incredibly cool details that you don't see later, but that you notice before you build the board and that also show how much heart and soul went into the project. Beautiful. Yes, I'm a big fan of such gimmicks even if you can't see the PCBs in the finished build. If you've ever built an original TOTEM from GEIST, you know how incredibly good PCB design can look.
Otherwise, the PCB of course offers the pads for diodes, HS sockets, there is space for a buzzer and the holes for the 4 screws for screwing the PCB into the case. On the upper edge of the PCB, i.e. where the microcontroller board will later sit, there is a recess into which the soldered parts of the MCU board fit exactly. This means that the microcontroller can be soldered to the board as flat as possible, enabling the incredibly flat design of the ENDGAME. The PCB itself is 219mm long, 94mm wide and 2mm high.
0x05 - BUILDING
The ENDGAME is not particularly complicated to build. If you have mastered the basic soldering skills, the board is quickly ready for use.
Let's start with the HS sockets. These are attached to the PCB with two soldering points. My procedure is as follows: solder on one pad of each pair, then solder the HS socket and in the third step solder the second soldering point. Of course, I don't do all three steps per switch here, but first solder step 1 on all switches, then in step two I put all the sockets on the PCB and in the third step all the sockets are fixed once.
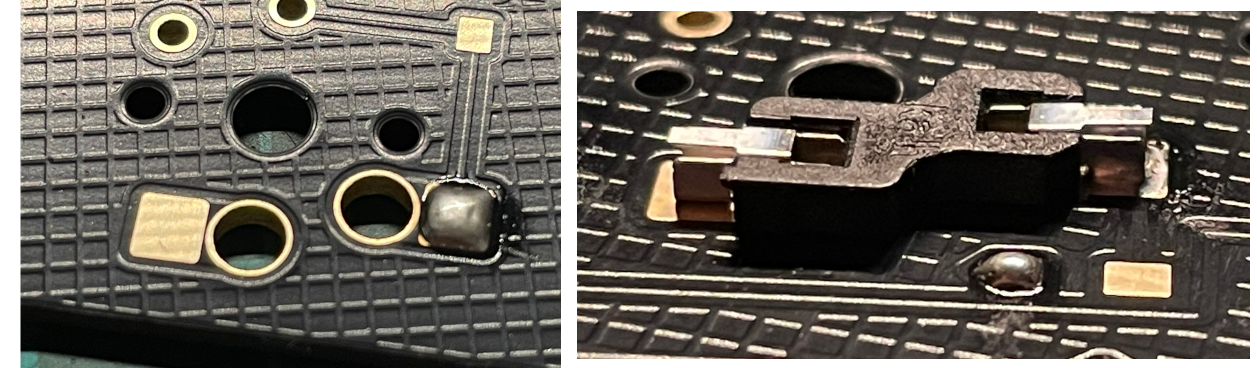
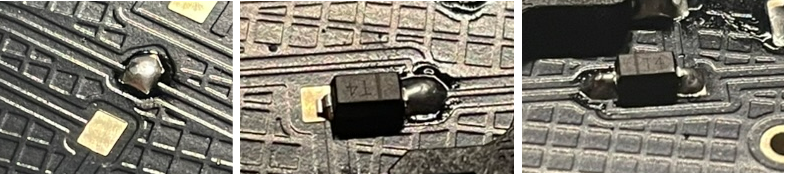
Then it's the turn of the SMD diodes. Again, apply solder to one pad of the pair, fix the diode in place and solder the second pad. This is again the same as with the sockets - each step for all diodes. This saves unnecessary handling and has clearly defined processes.
Third comes the 0xCB Helios. Here, solder is applied to a pad. Then the Helios is aligned and fixed by heating it again. After that, all the remaining pins can be easily soldered. Here it is important to ensure that the USB-C port points into the recess in the PCB.

That's actually all. Then press the rubber feet into the PCB and screw the PCB into the case.
You can then insert your LP switches (in my case Kailh LowProfile Twilights with linear 35g) and put caps on.
The hardware is now ready and if everything is soldered correctly and without any cold solder joints, you can flash the firmware onto the keyboard.
0x06 - FIRMWARE
As already mentioned above, the RP2040 needs .uf2 files instead of .hex files. These can be easily copied to the RP2040. Another good thing: you cannot brick the RP2040. This means that if something doesn't work, just debug it again and copy it back on.
Keeb.supply offers the default VIAL QWERTY firmware directly as a download. This means you don't have to compile it yourself and can get started right away. Thanks to the VIAL online config tool, you can adjust your keymap live if something about the QWERTY bothers you. VIAL is of course also available in the Nix packages:
CONFIGURATION.NIX
    environment.systemPackages = with pkgs; [
     vial
    ];
0x07 - CASE
The case of the ENDGAME is (at least in the kit from keeb.supply) a 3D printed FDM case. This means that the 3D printer prints layer by layer until the finished case is there and ready to be installed.
The case is 227mm x 102mm. The case slopes slightly towards the front, is 12mm high at the back and 8mm high at the front. The color is rather simple here with a simple black. Stylistically, the case is nothing unusual and follows the outline of the PCB. The upper edge is horizontal and at the bottom edge the case is aligned with the thumb keys and curves slightly downwards in the middle. That may sound unspectacular to some, but I have to say that these are exactly the shapes I like on keyboards. Simple, clearly defined lines that adapt to the key layout of the board.
Due to the slight rise towards the back, the keys on the top of the case are almost level with the surface and on the bottom edge they protrude some milimeters. This also brings another visual detail into play that I really like.
What I don't really like but doesn't spoil the fun: The bottom of the keyboard is open. This means that the PCB is bare in the PCB. The PCB is screwed into the top of the case and offers space for a total of 12 rubber feet, which guarantee the necessary distance from the desk and ensure that the board doesn't slip. It feels like the board could also do with a bottom, but these are details that can be argued about.
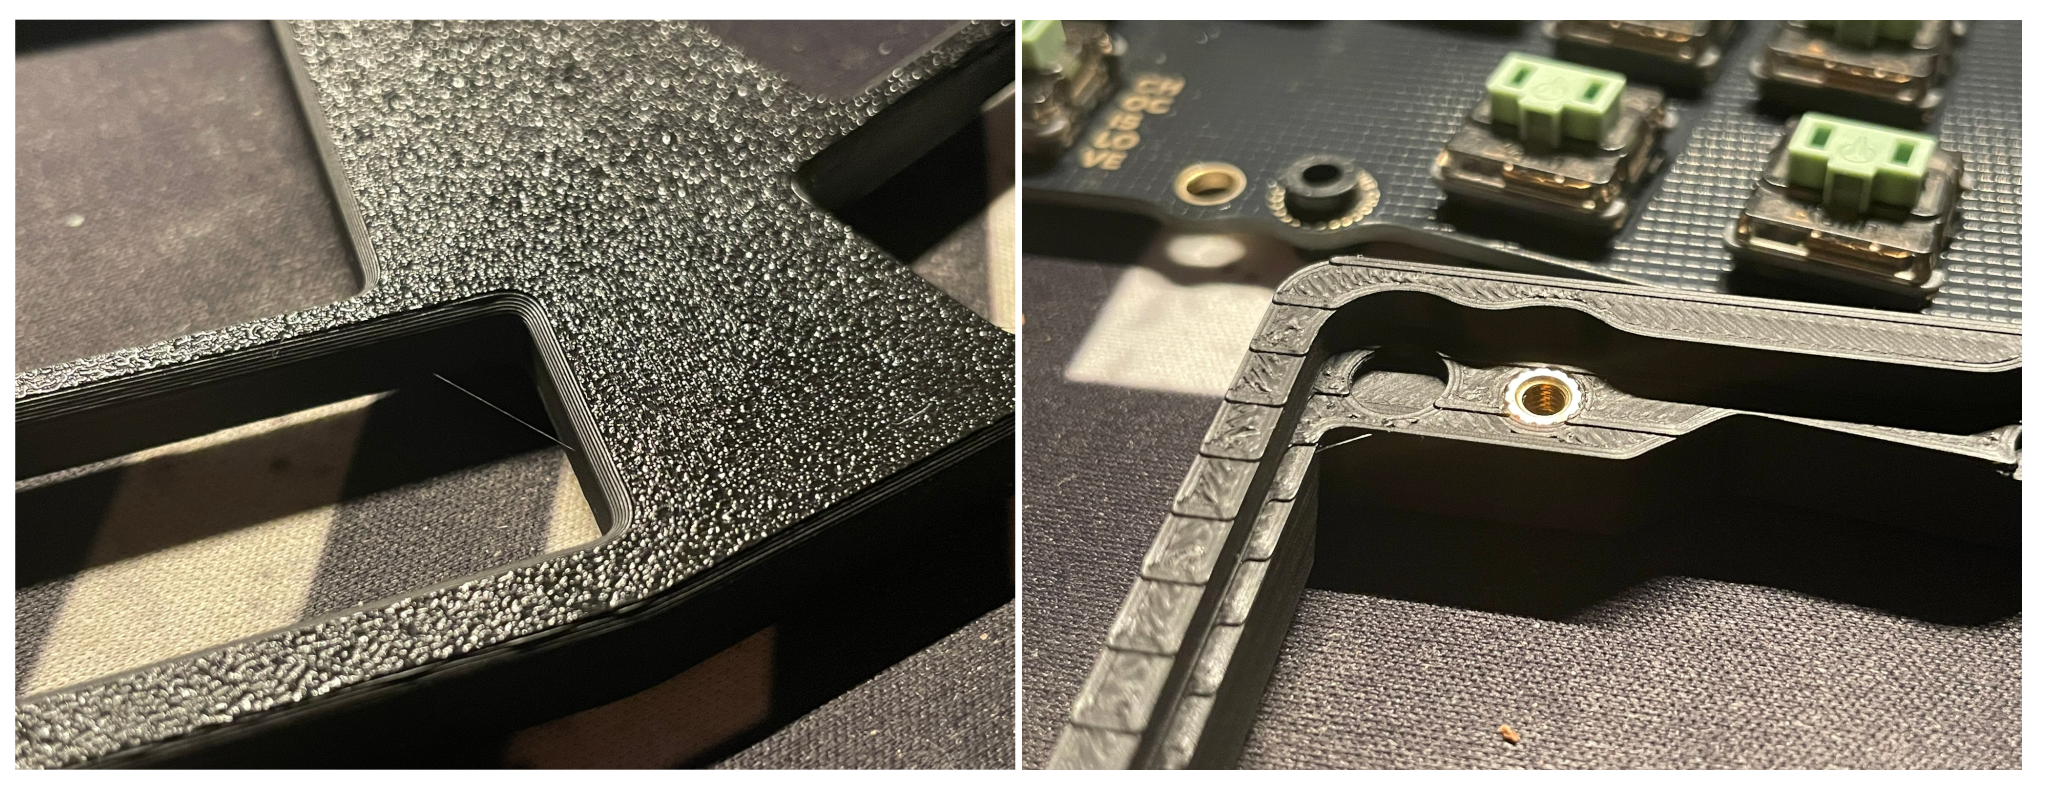
The FDM case does have one small disadvantage. Due to the layer printing process, these are unfortunately visible in some places. If you prefer smooth aluminum cases or resin cases, you will notice this straight away. Fortunately, this is not my first keyboard with an FDM case and I am used to the look. It doesn't bother me anymore - but I can understand if you don't like it.
0x08 - FAZIT
Is the ENDGAME really the endgame? I can't give you the answer, you have to decide for yourself. What I can say, however, is that the ENDGAME is really cool. The overall height of the board is very cool and lives up to the name low-profile. Nice and flat and the rubber feet mean it doesn't slip on the desk. The size of the board is also great. Small, handy and fits in any bag. The disadvantage here is the open bottom. Because of this, I wouldn't just throw the board in my backpack for fear of breaking something. Of course, I am aware that you have to decide between the height and the bottom here. The ENDGAME was originally based on the Alice layout. My experience with it was rather mediocre, but the splay and stagger are chosen in such a way that it doesn't irritate my brain as much as with an original Alice. What bothers me about the layout, however, are the 1u thumb keys. Similar to the Corne, they are positioned in such a way that you have to put your thumb under your index finger and that doesn't feel right. The 1.5u keys pushed outwards, however, are dedicated in such a way that they are perfect for the GUI key and Alt (both for XMonad).
All in all, the ENDGAME is cool and my shortcomings are on the one hand purely a matter of taste and on the other hand small details that don't detract from the fun of the keyboard. I'll play the ENDGAME for a while and I'm sure I won't be disappointed.
[~] BACK