If you work with a MacBook Pro for a while, you'll eventually miss a "real" keyboard. At first, you seem to be able to type faster on the butterfly keyboard, but you quickly miss a clearly noticeable keystroke or even the ESC key. So what's the alternative? The answer is simple - mechanical keyboards are the alternative. There are various providers who offer kits and want to charge a certain price for them. Now, this wouldn't be the NERD BUDE if I just bought one. So let's build our own mechanical keyboard!
SPOILER: This is the biggest "rabbit hole" I've fallen into in a long time.
1. Size
There are keyboard sizes everywhere. Before you think about which case, which switches, which keycaps you want, you should know what size the keyboard should be:Fullsize: The standard. Everyone knows it. Everyone has had it in their hand. It's exactly the size you find in every office. But you don't really want it.
Copact Fullsize: The CF has essentially the same keys as the Fullsize, but the distances between the keys are much smaller, which is supposed to make the keyboard "compact".
80% (TKL / Tenkeyless): Still the normal keyboard layout like a Fullsize, just without the numeric keypad.
75%: The basic layout of the Fullsize remains. Here, however, the cursor keys have moved to the left and are integrated unobtrusively. The F keys are still there and some of the special keys can be found in a column on the right edge.
65%: 10% less than 75% - means there are no more F keys.
60%: So what else can you leave out? Arrow keys! So no more arrow keys at 60%.
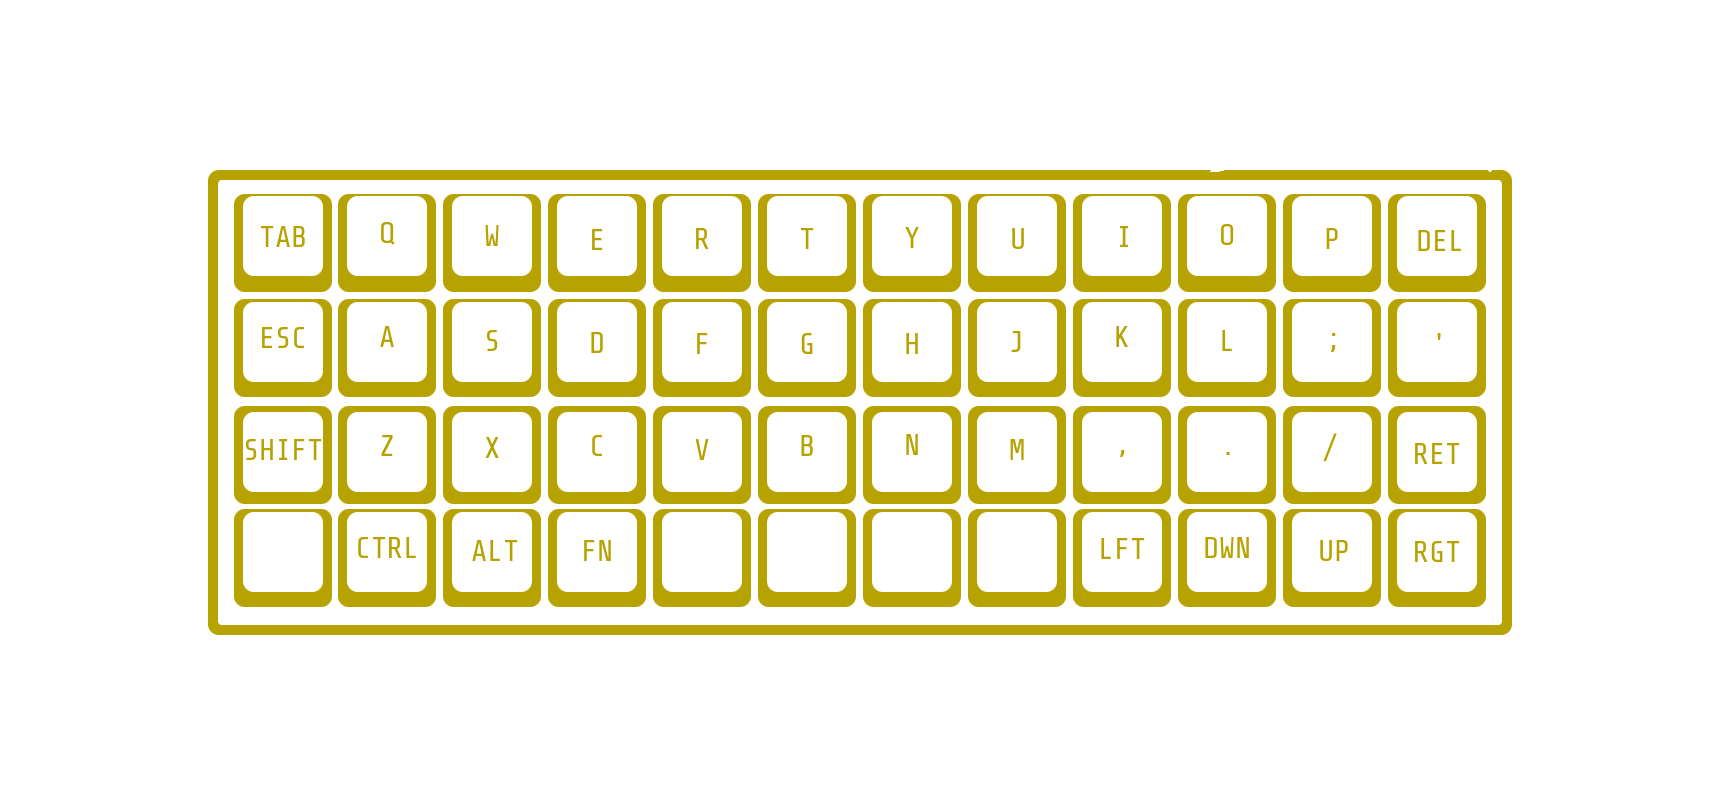
40%: Now it's getting exciting. The 40% keyboard still has the alpha keys (the letters) and a few mod keys like Shift, Tab, Space, Ctrl, Alt and Del. But the mod keys are also significantly reduced. That's also the size I chose!
2. Layout
Standard: The name says it all. The office keyboard mentioned above has exactly this layout. Slightly offset keys for comfortable typing. Still boring.Ortholinear: Here the keys are arranged without offset - so clearly divided into columns and rows. Most of the time all keys are the same size (no larger space key or similar) - that's what I chose.
Staggered Column: Here the individual columns are staggered in height, adapted to the length of the fingers. The offset in the rows is largely omitted.
Split Boards: To further improve ergonomics, the keyboard could be split in the middle and adapted to the orientation of the hands. Just like with the split boards.
3. Switches
The switches are available in a wide range of designs, pressure levels, with/one LED, clicky, etc. Here are the types that are offered - you have to plunge into the rabbit hole yourself to find out which switches you want on your keyboard. There are various testers that are offered that you can use to get a rough idea of how the switches will behave on the keyboard when you type.Buckling Spring: With the buckling spring switch, pressing the key loads a spring that buckles and thereby activates a switch. This type of switch can usually still be found in old Microsoft keyboards.
Topre / Rubberdome: With the rubber dome switch, a conical spring is used that is protected by rubber/silicone. When the key is pressed, the spring is compressed until there is contact between the key and the PCB and the signal flows through.
MX: Everyone knows them - everyone loves them. Or something like that. MX switches have a straight spring inside, which allows a noticeably straighter path. Switching takes place on the side of the stamp, which slides between two contacts and connects both contacts when the key is pressed.
ALPS: The classic is very similar to the MX switch in terms of function and only differs slightly in its structure.
Now you can sit down at the drawing board and start drawing. Luckily, you don't have to do this, as beautiful as it can be. There are practical tools for this. Online and compatible with every OS.
Der Keyboard Layout Editor: LINK
Here you can let your imagination run wild and even create your own layouts. A little tip in advance - it's best not to get hung up on the colors of the keycaps because you still have to find the keysets or have them produced. You can spend a lot of money on that.
Another function of the editor is the JSON file export. Regardless of whether you like the format or not, it gives you the option of generating a CAD file so that you have the right template for the keyplate straight away.
Who would have thought there was a tool for that too:
Keyplate Maker: LINK
This means that most of the planning is already done. The next steps are choosing the material and shape of the keyboard. However, you are on your own here if you don't want to use prefabricated cases.
I'm going with a simple wooden case with a total height of around 19mm. The only thing you should keep in mind here is that there should be space in the case for the microcontroller, otherwise the keyboard will not work and nobody wants that.
The next part will be about the microcontroller and the software that will run on it.
[~] BACK